RTF/ARF/PNF
Группа ВКонтакте
Flywoo Firefly 1S FR Nano Baby Quad True X 1.6" 40mm V1.2 PNP
Коптеры → Гоночные FPV-дроны → RTF/ARF/PNF → Коптеры 1.6" → Flywoo Firefly 1S FR Nano Baby Quad True X 1.6" 40mm V1.2 PNP
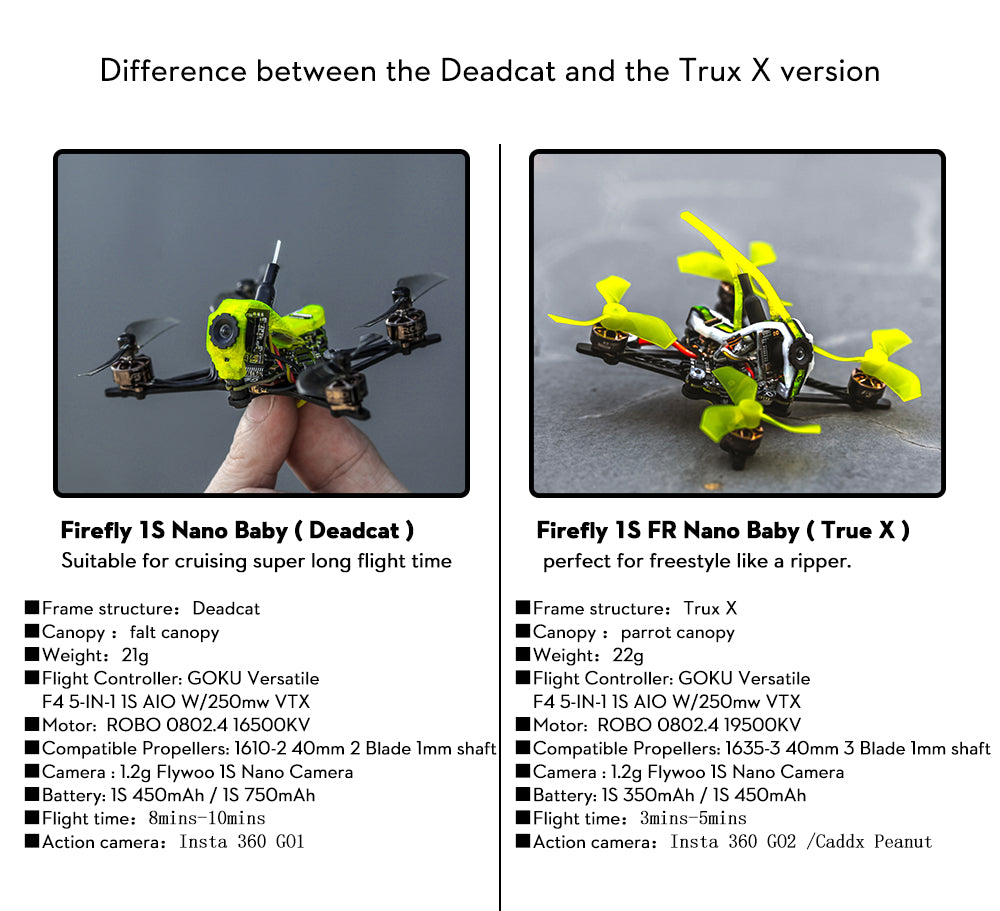
The Firefly 1S FR is a variation of the original. Sacrifices some flight time, but more agility and power! perfect for freestyle like a ripper.
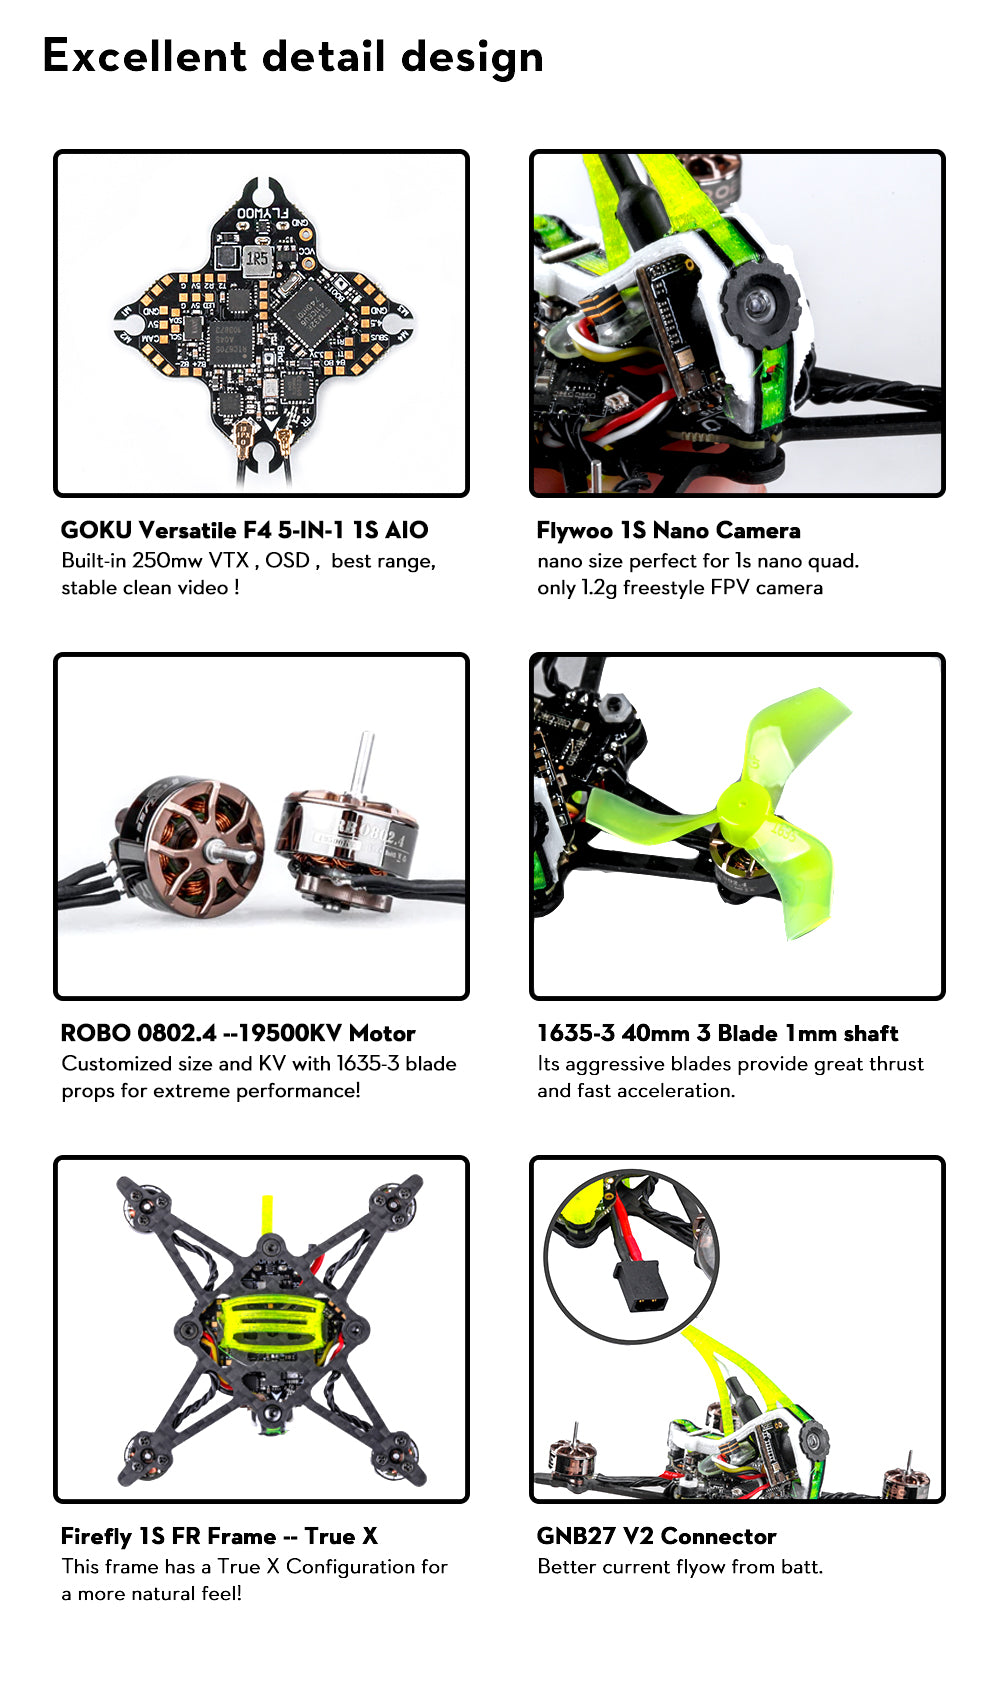
Customized 19500 KV with 1635-3 blade props for extreme performance!
Last but no least , a big thank you to @Ron Inciong for the new canopy design! We absolutely love it !
The difference between the Deadcat and the True X version
Features
- Equipped with GOKU Versatile F4 5-IN-1 1S AIO W/250mw VTX AIO Flight controller, which is specially designed for 1S Nano Drone . reliable and stable
- No Propellers in view, NO Jello flight Footage, stable flight picture
- perfect for freestyle like a ripper.

Specification
- Item: Firefly 1S FR Nano Baby Quad 40mm
- Weight:22g
- Flight Controller: GOKU Versatile F4 5-IN-1 1S AIO W/250mw VTX
- Motor: ROBO 0802.4 19500KV
- Compatible Propellers: 1635-3 1mm shaft
- Camera : 1.2g Flywoo 1S Nano Camera
Includes
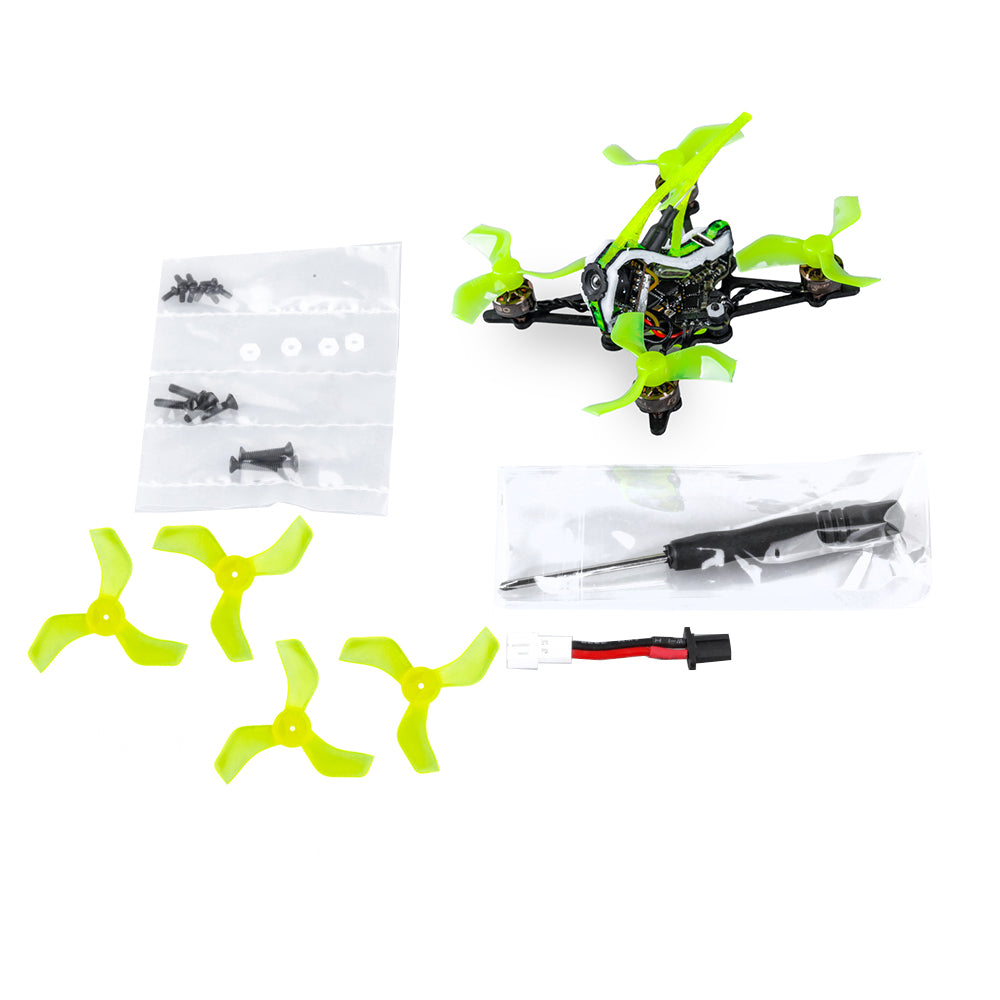
- 1 x Firefly 1S FR Nano Baby Quad 40mm Drone
- 2 x set of 1635-3 40mm props
- 1X Screw spare packs
- 1x GNB27 to PH2.0 adapter Cable

Warning
**Please do not try to update the ESC firmware. If AIO is damaged, Flywoo does not support after-sales.<br>
**Default ESC firmware: O_H_5_REV16_8-48K
Video
This is the newest version of the Flywoo Firefly Baby 1S Nano. The differences are a larger carbon fibre "X" frame and more powerful motors
Blog
Specs of Flywoo Firefly 1S Nano Baby Quad
- FC: GOKU Versatile F4 5-IN-1 1S AIO FC
- 250mW VTX
- Optional Receiver: Frsky / ExpressLRS 2.4G / TBS Crossfire
- Motor: ROBO 0802.4 19500KV
- Gemfan 40mm 1635-3 propellers (1mm shaft)
- Camera : Flywoo 1S Nano Camera
- 1S LiPo Battery
- Weight: 22g (without battery), 36g (with 1S 450mAh)
Here let me introduce you the flight controller and receiver used in the Nano Baby Quad.
Flywoo Versatile F4 1S 5in1 FC
Specs:
- Input Voltage: 1S LiPo
- BetaFlight FC Firmware: FLYWOOF411FR
- MCU: STM32F411CEU6
- Gyro: MPU6000
- Built-in BetaFlight OSD
- 2 UARTs (Uart2 is used for VTx control, so actually just one spare UART)
- Current Sensor: yes
- Buzzer pads: yes
- 5Ax4 BLHeli_S ESC
- Built-in VTX:
- Switchable VTX Output Power: 25mW / 100 / 250mW
- VTX Control: ImmersionRC Tramp
- Stack Size: 25x25mm
- Dimensions: 35x35xmm
- Weight: 4.2g

 Cool features of this AIO board:
- designed for tiny whoops and tiny 1S quads
- motors can be soldered directly to the board, it doesn’t use connectors
- it has built-in RX, however the RX is only SPI Frsky (D8/D16 compatible). You can still hook up an external RX to this FC as it has a spare UART, such as Crossfire or ExpressLRS.
- it has a built-in VTX with 250mW output power
- Antennas for both RX and VTX are removable – there are two IPEX connectors, the smaller one is for RX (Frsky SPI) and the bigger one for VTX antenna. If you are not using the Frsky RX, you can leave that antenna disconnected
- the solder pads are small but nicely spaced out, so it should be easier to work with than most other whoop FC out there
Flywoo 2.4GHz ExpressLRS EL24E RX
Cool features of Flywoo’s own ExpressLRS RX
- it’s almost the same size and weight as the Happymodel EP2, which is super tiny!
- it has built-in WiFi for firmware flashing
- Device Category is DIY 2.4GHz, Device is DIY 2400 RX ESP8285 SX1280.
You can learn about ExpressLRS here.
Procedure of flashing and binding are exactly the same as all other ExpressLRS receivers. You can learn how to do it in my tutorial.
How To Setup
FC Board Name: FLYWOOF411FR, pre-flashed with Betaflight 4.2.0. You can find the original CLI dump here.
Cool thing about this quad is that the ESC’s are already flashed with BLHeli_S 16.80. I am not sure exactly which custom firmware they are using, but RPM filter is enabled out of the box, and possibly 48KHz too.
To setup it up, first of all, bind the quad to your transmitter. Because I got the ELRS receiver, so I had to flash the RX to the latest version first with my binding phrase. You can learn how to do this in my tutorial.
Device Category is DIY 2.4GHz, Device is DIY 2400 RX ESP8285 SX1280. For some reason when I flashed it via WiFi, it didn’t want to bind to my TX although it came back with “flashing successful”. In the end I had to flash it via Betaflight Passthrough for it to work.
Once it’s bound and working (confirm in Receiver tab in Betaflight Configurator that the channels are responding to your sticks), you should make a few config adjustments.
In the Configuration tab:
- change PID Loop Frequency to 4KHz (it was on 2Khz originally)
- change ESC Protocol to DShot300 (from DShot600)
- disable Motor_Stop
- change motor poles from 14 to 12 (tiny motors have 12 poles, and 14 probably won’t work well for RPM filter)
- change arming angle from 25 to 180 (so you can arm the quad even when it’s on unlevel surface)
- Enable RX_SET under DShot Beacon, as it doesn’t have a buzzer, this will help you find it after you crash
In Modes tab, assign switches to Arm, Beeper and Flip Over After Crash.
In OSD, choose whatever elements you prefer on the screen.
That’s it! We are ready for first flight :)
Pictures


См. также


